Using JPA to build a J2EE 3-tier Web Application

The purpose of this entry is to demonstrate a full J2EE web application. The application will generate:

    1. a Java Persistence API (JPA) entity modeled on an existing database table
    2. an Enterprise JavaBean (EJB) which will query the database through the JPA
    3. a Servlet coupled with a JavaServer Faces (JSF) 2 framework for information display
    4. a Representational State Transfer (REST) resource capable of providing the JPA entities as web resources

The project will be built in Netbeans 7.2.1 and hosted on Glassfish 3.2.1

Start off by creating a Web Application project and specify the Glassfish Server. Then, clicking on the project, create a new Entity Class from Database (under Persistence) and specify the datasource along with the required tables. Specify a package. Check the NamedQuery, JAXB and Persistence Unit boxes.

Image

Next, create a new stateless EJB in the package (with the annotation @Stateless). We will be using JPA entities as RESTful resources, so tell netbeans to register all REST resources to the javax.ws.rs.Application class automatically and add a Jersey Library (JAX-RS implementation).

@javax.inject.Named
@Path("/customers")
@Stateless
public class CustomerSessionBean {

    @PersistenceContext
    EntityManager em;

    public List<Customer> getCustomers() {
        return (List<Customer>)em.createNamedQuery("Customer.findAll").getResultList();
    }

    //RESTful resource, access at http://localhost:8080/JavaEE6SampleApp/webresources/customers/customer/1
    @GET
    @Path("/customer/{id}")
    @Produces("application/xml")
    public Customer getCustomer(@PathParam("id")Integer id) {
        return
        (Customer)em.createNamedQuery("Customer.findByCustomerId")
        .setParameter("customerId", id).getSingleResult();
    }
}

Next, create the servlet that uses the EJB.

@WebServlet(name = "TestServlet", urlPatterns = {"/TestServlet"})
public class TestServlet extends HttpServlet {

    @EJB CustomerSessionBean ejb;

    // Access at http://localhost:8080/JavaEE6SampleApp/TestServlet
    protected void processRequest(HttpServletRequest request, HttpServletResponse response)
            throws ServletException, IOException {
        response.setContentType("text/html;charset=UTF-8");
        PrintWriter out = response.getWriter();
        try {
            out.println("<html>");
            out.println("<head>");
            out.println("<title>Servlet TestServlet</title>");
            out.println("</head>");
            out.println("<body>");
            out.println("<h1>Servlet TestServlet at " + request.getContextPath () + "</h1>");
            out.println(ejb.getCustomers());
            out.println("</body>");
            out.println("</html>");
        } finally {
            out.close();
        }
    }

    // HTTPServlet Methods go here
}

Next, we will go about creating the Context and Dependency Injection (CDI) which allows the EJB to support the JSF pages. Create a beans.xml file in the project and set the project framework to JSF. Create a Facelets Template (JSF) in the WEB-INF folder using one of the CSS layouts. Edit it to become:

<?xml version='1.0' encoding='UTF-8' ?>
<!DOCTYPE html PUBLIC "-//W3C//DTD XHTML 1.0 Transitional//EN" "http://www.w3.org/TR/xhtml1/DTD/xhtml1-transitional.dtd">
<html xmlns="http://www.w3.org/1999/xhtml"
      xmlns:ui="http://java.sun.com/jsf/facelets"
      xmlns:h="http://java.sun.com/jsf/html">
    <h:head>
        <meta http-equiv="Content-Type" content="text/html; charset=UTF-8" />
        <link href="./../resources/css/default.css" rel="stylesheet" type="text/css" />
        <link href="./../resources/css/cssLayout.css" rel="stylesheet" type="text/css" />
        <title>Facelets Template</title>
    </h:head>
    <h:body>
        <div id="top">
            <ui:insert name="top"><h1>Java EE 6 Sample App</h1></ui:insert>
        </div>

        <div id="content" class="center_content">
            <ui:insert name="content">Content</ui:insert>
        </div>

        <div id="bottom">
            <ui:insert name="bottom"><center>DEMO!</center></ui:insert>
        </div>
    </h:body>
</html>

Delete the old index.xhtml file and replace it with a new Facelets Template Client copy. In this case, the root tag used is :

<?xml version='1.0' encoding='UTF-8' ?>
<!DOCTYPE composition PUBLIC "-//W3C//DTD XHTML 1.0 Transitional//EN" "http://www.w3.org/TR/xhtml1/DTD/xhtml1-transitional.dtd">
<ui:composition xmlns:ui="http://java.sun.com/jsf/facelets"
                template="./WEB-INF/template.xhtml"
                xmlns:h="http://java.sun.com/jsf/html">
    <ui:define name="content">
        <h:dataTable value="#{customerSessionBean.customers}" var="c">
            <h:column>#{c.name}</h:column>
            <h:column>#{c.customerId}</h:column>
        </h:dataTable>
    </ui:define>
</ui:composition>

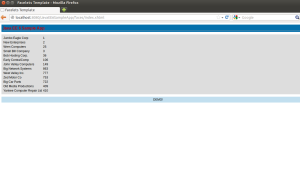
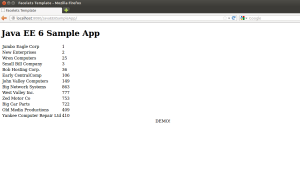
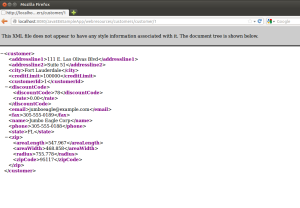
And we are done. The final results are:

Screenshot from 2013-01-07 12:34:30 Screenshot from 2013-01-07 12:34:43 Screenshot from 2013-01-07 12:34:53 Screenshot from 2013-01-07 12:35:17

A simple java program to simulate a stopwatch

Recently, I wrote a small java program to simulate a stopwatch count down by using java.util.Timer class method scheduleAtFixedRate(TimerTask task, long delay, long period) which schedules the specified task for repeated fixed-rate execution, beginning after the specified delay. Subsequent executions take place at approximately regular intervals, separated by the specified period.

My program just simply count down from 1000 to 1 second by second roughly.

//Stopwatch

import java.util.Timer;
import java.util.TimerTask;

public class Stopwatch {
  static int interval;
  static Timer timer;

  public static void main(String[] args) {

    int delay = 1000;
    int period = 1000;
    timer = new Timer();
    interval =10000;
    timer.scheduleAtFixedRate(new TimerTask() {
      public void run() {
         System.out.println(setInterval());
      }
    }, delay, period);
  }

  private static final int setInterval(){
    if( interval== 1) timer.cancel();
      return --interval;
  }
}

Prototype for Real Time Data Streaming (Data Push) Part 3

This is the part 3 of the series. Here are the other parts of the series.

Prototype for Real Time Data Streaming (Data Push) Part 1: maven2 generated Jetty based application

Prototype for Real Time Data Streaming (Data Push) Part 2: multi-channel subscription based web application

Prototype for Real Time Data Streaming (Data Push) Part 3: channel feeder java based application

In the previous blogs, I have shown how to create a web based application to allow users to subscribe multiple channels on jetty embedded server. However, they still cannot see any data from those channels because there is no data being fed onto them.

In the following, I will show how to create a java application to feed data onto the channel.

ChannelFeeder.java

The ChannelFeeder is the generic middle man program. It reads from input and sends it immediately to the designate channel. It requires a named channel as an input argument (such /123. /sar. etc) which were defined in part 2.

ChannelFeeder.java

import java.io.IOException;
import java.io.BufferedReader;
import java.io.InputStreamReader;
import java.util.HashMap;
import java.util.Map;
import org.cometd.bayeux.Channel;
import org.cometd.bayeux.Message;
import org.cometd.bayeux.client.ClientSessionChannel;
import org.cometd.bayeux.client.ClientSession;
import org.cometd.client.BayeuxClient;
import org.cometd.client.transport.ClientTransport;
import org.cometd.client.transport.LongPollingTransport;
import org.eclipse.jetty.client.HttpClient;
import org.eclipse.jetty.http.HttpBuffers;
import org.eclipse.jetty.util.component.AbstractLifeCycle;

public class ChannelFeeder { 
    private static String CHANNEL;
    private static final ClientSessionChannel.MessageListener DevListener = new DevListener();

    private static class DevListener implements ClientSessionChannel.MessageListener
    {
        public void onMessage(ClientSessionChannel channel, Message message)
        {
            // Here we received a message on the channel
            System.out.println("Sending:"+message.getData().toString());
        }
    }

    public static void main(String[] args) throws Exception {
        try { 

        if(args.length == 1)
        {
            CHANNEL = (args[0].charAt(0) == '/') ? args[0] : '/'+args[0];
        }
        else
        {    
            System.out.println("Enter new channel name");
            System.exit(1);
        } 

        // Create (and eventually setup) Jetty's HttpClient
        <span style="color:#ff0000;">HttpClient httpClient = new HttpClient();</span>

        // Setup Jetty's HttpClient
        <span style="color:#ff0000;">httpClient.start();</span>

        // Prepare the transport    
        Map&lt;String, Object&gt; options = new HashMap&lt;String, Object&gt;();
        ClientTransport transport = LongPollingTransport.create(options, httpClient);

        //ClientSession client = new BayeuxClient("http://localhost:8080/cometd", transport);
        <span style="color:#ff0000;">final BayeuxClient client = new BayeuxClient("http://localhost:8080/DeviceMonitor/cometd", transport);
</span>
        // Setup the BayeuxClient<span style="color:#ff0000;">
        client.getChannel(Channel.META_CONNECT).addListener(new ClientSessionChannel.MessageListener()</span>
        {
            public void onMessage(ClientSessionChannel channel, Message message)
            {
                //connected.set(message.isSuccessful());
            }
        });
<span style="color:#ff0000;">        client.getChannel(Channel.META_HANDSHAKE).addListener(new ClientSessionChannel.MessageListener()</span>
        {
            public void onMessage(ClientSessionChannel channel, Message message)
            {
                //connected.set(false);
            }
        });

<span style="color:#ff0000;">        client.handshake();</span>

        boolean handshaken = client.waitFor(1000, BayeuxClient.State.CONNECTED);
        if (handshaken)
        {
            // subscribe to the channel to normal (broadcast) channels
<span style="color:#ff0000;">            client.getChannel(CHANNEL).subscribe(DevListener);</span>

<span style="color:#ff0000;">            // the follow are commented out because we don't want to publish anything here.</span>
<span style="color:#ff0000;">            // We just want to pipe it from the input</span>
            // publish data to the normal channels
            //Map&lt;String, Object&gt; data = new HashMap&lt;String, Object&gt;();
            // Fill in the data. Publishing data on a channel is an asynchronous operation.
            //client.getChannel(CHANNEL).publish(data);
            //Map&lt;String, Object&gt; data = new HashMap&lt;String, Object&gt;();
            //data.put("name", "\"DevClient\"");

            //client.getChannel(CHANNEL).publish(data);

            System.out.println("Ready... (\"q\" to exit)");
            final BufferedReader inReader = new BufferedReader(new InputStreamReader(System.in));
            do {
                final String userInput = inReader.readLine();
                if (userInput == null || "q".equals(userInput)) {
                    break;
                }

                //connection.write(userInput);

                <span style="color:#ff0000;">client.getChannel(CHANNEL).publish(userInput);</span>
            } while (true);
        }

<span style="color:#ff0000;">        client.disconnect();
        client.waitFor(1000, BayeuxClient.State.DISCONNECTED);</span>

        } catch (IOException e) {
            e.printStackTrace();
        }

    } //end of main
} // end of class

feed.bash

This is a wrapper shell script to make our test easy. The execution is like

./feed.bash 123

This will allow you to key in anything from the screen, and the result will be sent to the channel 123. If the user choose channel 123 from the web browser, it will subscribe to it and see whatever you type from that onward.

./feed.bash stopwatch is to activate Stopwatch.java program. It just a count-down second by second java program. I will provide this program in another blog.

./feed.bash sar will pipe unix ‘sar -u 2 10000’ command output to the ‘sar’ for those subscribers where they can watch real time feed from remote browser. This will apply for the rest option like iostat, vmstat and ifstat.

All of these are just the simulation of the devices. The likely application for these technologies are for field devices in transportation systems, the appliance devices in home automation etc.

#! /bin/bash
if [ $# -ne 1 ]
then
    echo "$0 channel_name"
    exit 1
fi

export CHANNEL=$1

export CLASSPATH=bayeux-api-2.4.1.jar:cometd-java-client-2.4.1.jar:cometd-java-common-2.4.1.jar:jetty-client-8.0.1.v20110908.jar:jetty-http-8.0.1.v20110908.jar:jetty-util-8.0.1.v20110908.jar:jetty-io-8.0.1.v20110908.jar:slf4j-api-1.6.4.jar:slf4j-simple-1.6.4.jar:.

cd ~/test/mvn/DevClient

case "${CHANNEL}" in
     123)
           java -cp ${CLASSPATH} ChannelFeeder ${CHANNEL}
           ;;
     stopwatch)
           <span style="color:#ff0000;">java Stopwatch</span> | java -cp ${CLASSPATH} ChannelFeeder ${CHANNEL}
           ;;
     sar)
           <span style="color:#ff0000;">sar -u 2 10000</span> | java -cp ${CLASSPATH} ChannelFeeder ${CHANNEL}
           ;;
     iostat)
           <span style="color:#ff0000;">iostat -xtc 2</span> 10000 | java -cp ${CLASSPATH} ChannelFeeder ${CHANNEL}
           ;;
     vmstat)
           <span style="color:#ff0000;">vmstat 2 10000</span> | java -cp ${CLASSPATH} ChannelFeeder ${CHANNEL}
           ;;
     ifstat)
           <span style="color:#ff0000;">ifstat</span> | java -cp ${CLASSPATH} ChannelFeeder ${CHANNEL}
           ;;
     *)
           echo "Channel not defined."
           exit
           ;;
esac
exit 0

Test Drive

The following script should open many tabs in your terminal and feed all the channels. This can use to stress test your machine. For my 2GB machine, I only can run these 6 times, and the system is totally unresponsive after it.

#!/bin/bash
if [ $# -ne 1 ]
then
    echo "$0 Feed_base_dir"
    exit 1
fi
gnome-terminal --tab --title=123 -e "$1/feed 123"  --tab --title=stopwatch -e "$1/feed stopwatch" --tab --title=sar -e "$1/feed sar" --tab --title=iostat -e "$1/feed iostat" --tab --title=vmstat -e "$1/feed vmstat" --tab --title=ifstat -e "$1/feed ifstat"
exit 0

Prototype for Real Time Data Streaming (Data Push) Part 2

This is the part 2 of the serial. Here is the other parts of the series.

Prototype for Real Time Data Streaming (Data Push) Part 1: maven2 generated Jetty based application

Prototype for Real Time Data Streaming (Data Push) Part 2: multi-channel subscription based web application

Prototype for Real Time Data Streaming (Data Push) Part 3: channel feeder java based application

In the part 1 of this serial, I created a project DeviceMonitort by using mvn. In the following, I will modify the web application to support multi-channels subscription based web application housing on Jetty 7 embedded server.

Multi-Channel subscription based Web Application

Web Pages

First, I will replace the index.jsp with there html files: index.html, frameleft.html and frameright.html.

index.html

<html>
<head>
<title>Device Monitor</title>
</head>
<frameset cols="30%,70%">
<frame src="frameleft.html" name="left_frame">
<frame src="frameright.html" name="right_frame">
</frameset>

frameleft.html

Here I demonstrates multiple channel selections on the left frame, and users can choose whatever predefined channels they want to subscribe. In fact, the channel name can be generalized as anything.

<html>
<head>
<title>frameleft</title>
<script language="JavaScript" type="text/javascript">
<!--
function change(channel)
{
parent.left_frame.document.form1.text1.value=channel;
parent.right_frame.location="device.jsp";
}
//-->
</script>
</head>
<body bgcolor="#ffffff" text="#000000">
<FORM name="form1">
Choose a channel from the list:
<INPUT type="text" name="text1" size="25" value="/123" readonly="readonly">
</FORM>
<a href="javascript:change('/123')">/123</a>
<br>
<a href="javascript:change('/stopwatch')">/stopwatch</a>
<br>
<a href="javascript:change('/sar')">/sar</a>
<br>
<a href="javascript:change('/iostat')">/iostat</a>
<br>
<a href="javascript:change('/vmstat')">/vmstat</a>
<br>
<a href="javascript:change('/ifstat')">/ifstat</a>
</body>
</html>

frameright.html

<HTML>
<HEAD>
<TITLE>Device Monitor Introduction</TITLE>
</HEAD>
<BODY>
<p>Cometd is a project by the Dojo Fundation to implement Bayeux specification. </p>
<br>
<p>Bayeux is a purpose to implement responsive user interaction for web clients using Ajax and server-push technique called Comet.</p>
<br>
<p>The messages are routed via named channels and can be delivered server2client, client2server or client2client.</p>
<br>
<p>Channels are by default broadcast publish subscribe. </p>
</FORM>
</BODY>
</HTML>

Other Files

The device.jsp file is modified from index.jsp. It allows the parameterized channelName to be passed to dev.js.

device.jsp

<!DOCTYPE html PUBLIC "-//W3C//DTD XHTML 1.0 Strict//EN" "http://www.w3.org/TR/xhtml1/DTD/xhtml1-strict.dtd">
<html>
<head>
<meta http-equiv="Content-Type" content="text/html;charset=utf-8" />
<script type="text/javascript" src="${pageContext.request.contextPath}/jquery/jquery-1.7.1.js"></script>
<script type="text/javascript" src="${pageContext.request.contextPath}/jquery/json2.js"></script>
<script type="text/javascript" src="${pageContext.request.contextPath}/org/cometd.js"></script>
<script type="text/javascript" src="${pageContext.request.contextPath}/jquery/jquery.cometd.js"></script>
<span style="color:#ff0000;"><script type="text/javascript" src="dev.js"></script></span>
<%--
The reason to use a JSP is that it is very easy to obtain server-side configuration
information (such as the contextPath) and pass it to the JavaScript environment on the client.
--%>
<script type="text/javascript">
	var config = 	{
		contextPath: 	'${pageContext.request.contextPath}',
				 channelName: parent.left_frame.document.form1.text1.value
			};</span>
</script>
</head>
<body>

<div id="body"></div>

</body>
</html>

The jquery dev.js is modified from application.js, and is called by device.jsp above, and it subscribes to config.channelName.

dev.js

(function($)
{
var cometd = $.cometd;

$(document).ready(function()
{
function _connectionEstablished()
{
$('#body').prepend('<div>CometD Connection Established</div>');
}

function _connectionBroken()
{
$('#body').prepend('<div>CometD Connection Broken</div>');
}

function _connectionClosed()
{
$('#body').prepend('<div>CometD Connection Closed</div>');
}

// Function that manages the connection status with the Bayeux server
var _connected = false;
function _metaConnect(message)
{
if (cometd.isDisconnected())
{
_connected = false;
_connectionClosed();
return;
}

var wasConnected = _connected;
_connected = message.successful === true;
if (!wasConnected && _connected)
{
_connectionEstablished();
}
else if (wasConnected && !_connected)
{
_connectionBroken();
}
}

// Function invoked when first contacting the server and
// when the server has lost the state of this client
function _metaHandshake(handshake)
{
if (handshake.successful === true)
{
cometd.batch(function()
{
cometd.subscribe(config.channelName, function(message)
{
//$('#body').append('<div>Server Says: ' + message.data + '</div>');
$('#body').prepend('<div>['+config.channelName+'] ' + message.data + '</div>');
});
// Publish on a service channel since the message is for the server only
//cometd.publish('/123', { name: 'World' });
});
}
}

// Disconnect when the page unloads
$(window).unload(function()
{
cometd.disconnect(true);
});

var cometURL = location.protocol + "//" + location.host + config.contextPath + "/cometd";
cometd.configure({
url: cometURL,
logLevel: 'debug'
});
$('#body').<span style="color:#ff0000;">prepend</span>('<div>Connecting to ['+config.channelName+']'+'</div>');
cometd.addListener('/meta/handshake', _metaHandshake);
cometd.addListener('/meta/connect', _metaConnect);

cometd.handshake();
});
})(jQuery);

By now, the multi-channel web based application is ready to go. Just start your jetty server:

mvn install jetty:start

Go to http://localhost:8080/  The following is the web application page:

Device Monitor Main Page

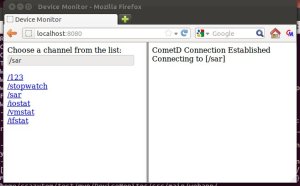
For example, click channel ‘/sar’ and you will subscribe to /sar. Of course, you just get the following screen because there isn’t any data feed onto the channel.

Device Monitor (/sar channel)

Device Monitor (/sar channel)

In the next post, I will show how to develop a java application to feed data onto the channel.

Prototype for Real Time Data Streaming (Data Push) Part 1

Real time data streaming from remote devices (ie. data pushing) has been a fascinating topic. In this series of blogs, I will examine how to implement a prototype to demonstrate the capability of pushing data from devices (java client) via embedded light weight web server JETTY (JETTY 7 / COMETD 2 / Bayeux Protocol) to your web browser (Javascript / JQuery). The series includes three parts:

Prototype for Real Time Data Streaming (Data Push) Part 1: maven2 generated Jetty based application

Prototype for Real Time Data Streaming (Data Push) Part 2: multi-channel subscription based web application

Prototype for Real Time Data Streaming (Data Push) Part 3: channel feeder java based application
The prerequisites for the prototype are MAVEN2, JETTY 7, JAVA SDK and JQUERY. I am doing on Ubunto 11.04. I believe it can be generalized on any linux distro. Also don’t worry too much on the minor version of all the prerequisites because MAVEN2 will take care of all the software and version dependencies. That’s why we use MVN. We just need to tell it what our goal is, and let it take care of the rest.

Maven 2 Jetty based Web Application

Get Started

I will create a server side web application for Jetty 7 by using mavern2.

 mvn archetype:generate -DarchetypeCatalog=http://cometd.org

It will present a few archetypes to choose. choose the following

4: http://cometd.org -> org.cometd.archetypes:cometd-archetype-jquery-jetty7 (2.4.3 - CometD archetype for creating a server-side event-driven web application)

Then provide some parameters like the following:

Define value for property 'groupId': : henry416      
Define value for property 'artifactId': : DeviceMonitor
Define value for property 'version': 1.0-SNAPSHOT: 
Define value for property 'package': DeviceMonitor: 
[INFO] Using property: cometdVersion = 2.4.3
[INFO] Using property: jettyVersion = 7.6.4.v20120524
[INFO] Using property: slf4jVersion = 1.6.4
....

From it, a project called DeviceMonitort is created.  We can really test drive this web application now. Here is how we start jetty embedded server:

mvn install jetty:run
....
2012-09-23 12:18:28.567:INFO:oejs.AbstractConnector:Started SelectChannelConnector@0.0.0.0:8080
[INFO] Started Jetty Server
[INFO] Starting scanner at interval of 10 seconds.

Test drive by http://localhost:8080/ from web browser:

CometD Connection Established
Server Says: Hello, World
This is just like any programming where we always start with HELLO WORLD. Don’t stop here. Let’s explore what was created:

Exploring

In web.xml, it defines two servlets:


<servlet>
<servlet-name>cometd</servlet-name>
<servlet-class>org.cometd.server.CometdServlet</servlet-class>
<load-on-startup>1</load-on-startup>
</servlet>
<servlet-mapping>
<servlet-name>cometd</servlet-name>
<url-pattern>/cometd/*</url-pattern>
</servlet-mapping>

<servlet>
<servlet-name>initializer</servlet-name>
<servlet-class>DevServ.BayeuxInitializer</servlet-class>
<load-on-startup>2</load-on-startup>
</servlet>

In DevServ/BayeuxInitializer.java, it creates new HelloService(bayeux);
In DevServ/HelloService.java, it adds service : addService(“/service/hello”, “processHello”);
In processHello, it reads from input (name), writes to output (“greeting”, “Hello, ” + name), and remote.deliver(getServerSession(), “/hello”, output, null); Here /hello is the channel.

In index.jsp, it obtains context-path contextPath: ‘${pageContext.request.contextPath}’ dynamically, and pass control to application.js
In application.js, it does:

...
...
        $(window).unload(function()
        {
            cometd.disconnect(true);
        });

/// 1. configure URL for cometd protocol
        var cometURL = location.protocol + "//" + location.host + config.contextPath + "/cometd";
        cometd.configure({
            url: cometURL,
            logLevel: 'debug'
        });

/// 2. add meta listener
        cometd.addListener('/meta/handshake', _metaHandshake);
        cometd.addListener('/meta/connect', _metaConnect);

/// 3 handshake
        cometd.handshake();
...

Here is what metaHandshake do: subscribe to /hello channel, and publish { name: ‘World’ } to channel ‘/service/hello’, when the message push back, it displays $(‘#body’).append(‘<div>Server Says: ‘ + message.data.greeting + ‘</div>’);

...
 function _metaHandshake(handshake)
 {
 if (handshake.successful === true)
 {
 cometd.batch(function()
 {
 cometd.subscribe('/hello', function(message)
 {
 $('#body').append('<div>Server Says: ' + message.data.greeting + '</div>');
 });
 // Publish on a service channel since the message is for the server only
 cometd.publish('/service/hello', { name: 'World' });
 });
 }
 }
 ...